 mands more and more from bottle manufacturers to actively improve quality control. Current and future trends suggest that plastic bottle light weighting is becoming more common due to environmental effects and cost saving initiatives. This demand lends itself to comprehensive inspection to minimize defects whilst producing a cost effective product.
Presently to gain knowledge of material distribution in a plastic beverage bottle base, a common procedure is to cut the bottle base to take a weight measurement. There are alternative methods for checking bottle base thickness however due to varying angles and operator influence, accuracy and repeatability are frequently affected.
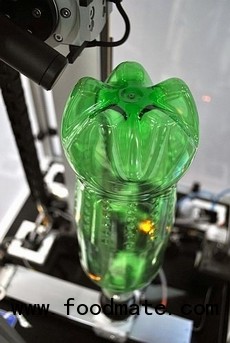
Weight checks fail to give a detailed description of base quality. Improper formation of the base can stem from the manufacture of the preform or production setup, leading to bottle manufacturing inconsistencies. Trac Measurement Systems new B300 Bottle Wall Thickness System allows measurements to be taken at finite intervals of 50 microns with a sensor spot size of 7.2 microns. Measuring thickness variation in the bottle base is critical to PET bottle manufacturers; Trac’s Wall Thickness Gauge facilitates comprehensive measurements to be taken at user definable positions ensuring a fast, non-destructive, non-contact, accurate measurement.
Trac Measurement Systems recently launched their new B300 Bottle Wall Thickness Gauge for PET Beverage bottles at the Drinktec 2013 Show. “The machine proved to be incredibly popular at the show with positive feedback from major beverage fillers and PET plastic bottle manufacturers” said Clodagh Monahan Trac Measurement Systems’ Sales and Business Development Engineer for PET.
The machine brings several innovative measurement benefits including the capability to produce a highly detailed measurement report of up to 4800 points. These points are taken by the sensor from outside of the bottle whilst maintaining perpendicularity to the bottle surface, thus preventing angular errors giving significant measurement benefits over traditional infra-red systems. The inspection system measurements are traceable to UKAS standards. The sensor can also be rotated to specified positions which will suit all bottle designs giving outstanding flexibility.
Other additional benefits include innovative highly accurate linear sensor technology within the gauge, factory calibrated with no additional need for calibration, a Magna-Mike or reference gauge. The system can take up 960 measurements per feature type and completely eliminates the need for base weight checks. A 7.2micron spot measurement enables a more inclusive positional test and finally bottle height, base clearance, base thickness, base corner thickness, shoulder and wall thickness can be tested in one operation.


